Introduction
There is a distinct magic that permeates the air when autumn arrives, a crispness that invites us indoors to seek warmth and comfort. Among the pantheon of cozy fall desserts, few hold a candle to the irresistible allure of a freshly baked apple cobbler. The aroma alone—sweet cinnamon mingling with caramelized sugar and the earthy scent of baked dough—is enough to transform a house into a home. This Irresistible Buttery Apple Cobbler Recipe is not merely a dessert; it is an experience, a celebration of the harvest season designed to be shared around a table with loved ones.
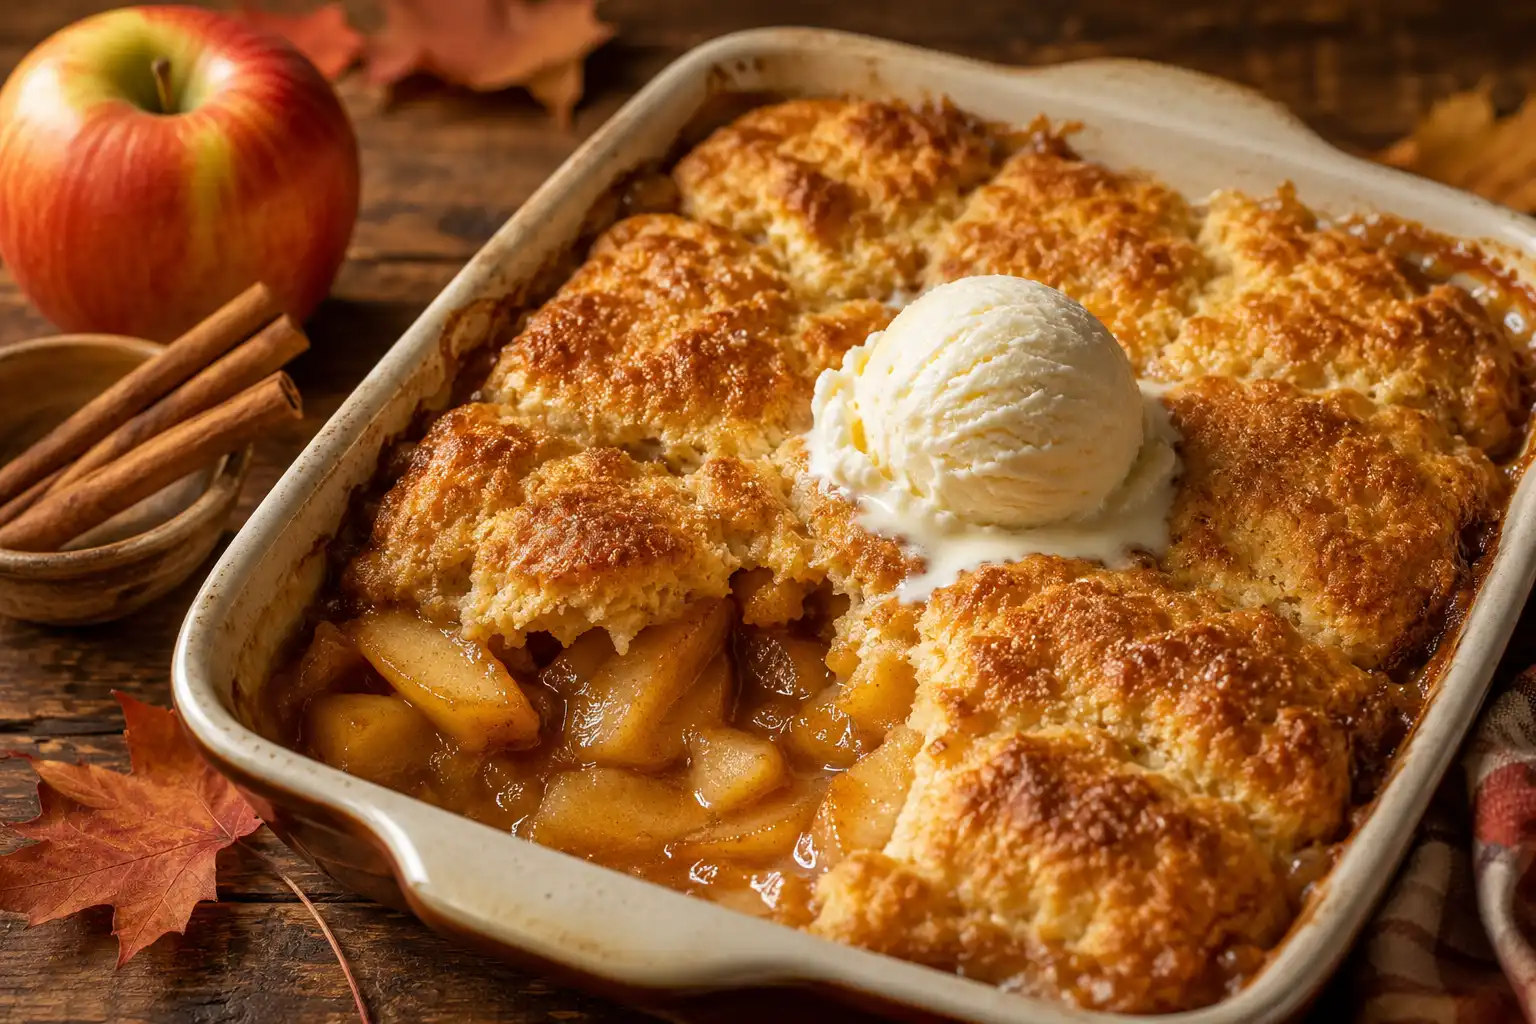
Unlike pies that require meticulous crust rolling or crisps that rely heavily on oats, a cobbler offers a unique textural contrast. The fruit filling bubbles up around dollops of buttery, biscuit-like dough, creating pockets of softness amidst the tender, spiced apples. The topping becomes golden and slightly crisp on the edges while remaining pillowy in the center, soaking up the juices that rise during the baking process. It is the perfect vehicle for a scoop of vanilla bean ice cream or a drizzle of warm salted caramel sauce.
Whether you are a seasoned baker looking to refine your technique or a novice eager to create something impressive without undue stress, this recipe is tailored for you. It balances simplicity with depth of flavor, ensuring that every bite delivers the quintessential taste of fall. As the leaves change color outside, let the oven work its magic inside, filling your kitchen with the nostalgic scents of childhood memories and holiday gatherings.
The History
The origins of the cobbler are as warm and murky as the dessert itself, rooted deeply in British and American colonial history. The term “cobbler” is believed to have emerged in the British American colonies in the mid-1700s. Unlike the European tradition of precise pastry crusts, early settlers often lacked the proper tools, ingredients, or time to create traditional pie crusts. Instead, they dropped spoonfuls of biscuit or dough batter directly over stewed fruit in a deep baking dish.
Etymologically, some food historians suggest the name comes from the appearance of the finished dish. The rough, uneven surface of the dropped dough resembled a cobblestone street, hence “cobbler.” Others argue it is a corruption of the word “cobber,” referring to a deep dish pudding. Regardless of the naming convention, the technique was born out of necessity and ingenuity. It allowed cooks to utilize seasonal fruits without the labor-intensive process of lining a pie tin with pastry.
During the 19th century, cobblers became a staple in American households, particularly in the South and Midwest where orchards were plentiful. As baking powder became commercially available in the mid-1800s, the topping evolved from heavy bread dough to the lighter, fluffier biscuit-style topping we recognize today. Throughout the Great Depression and World War II, cobblers remained popular because they stretched limited supplies of sugar and flour while maximizing the use of home-canned or fresh fruit. Today, it stands as a timeless classic, bridging the gap between rustic simplicity and gourmet comfort.
Ingredients Breakdown
The Apples: The heart of this dessert lies in the fruit. Not all apples are created equal when it comes to baking. You want a variety that holds its shape under heat rather than turning into applesauce. Granny Smith apples are the gold standard for their tartness and firm structure, but mixing them with a sweeter variety like Honeycrisp or Fuji adds complexity. The balance of acid and sugar is crucial for preventing the filling from becoming one-note sweet.
The Butter: Since this is a “Buttery” Apple Cobbler, the quality of fat matters. Unsalted butter is preferred so you can control the sodium levels exactly. Cold butter is essential for the topping; when cold butter hits the hot oven, the water content evaporates rapidly, creating steam pockets that lift the dough, resulting in a flaky, tender texture rather than a dense cookie-like top.
The Sugar: A combination of granulated white sugar and light brown sugar is used. White sugar provides straightforward sweetness, while brown sugar introduces molasses notes that complement the spices. The sugar also interacts with the apple juices to create a natural thickening syrup as the pectin in the fruit activates.
The Flour: All-purpose flour is the structural backbone of the biscuit topping. It contains enough protein to provide structure but not so much that the topping becomes tough. For the filling, a small amount of flour or cornstarch is often added to absorb excess liquid released by the apples during baking, ensuring the sauce is luscious rather than watery.
The Spices: Cinnamon is the non-negotiable star, but nutmeg and allspice add warmth and depth. Freshly grated nutmeg offers a more aromatic profile than pre-ground varieties. A pinch of salt is vital in both the filling and the topping to enhance the sweetness and prevent the dessert from tasting flat.
The Leavening: Baking powder is the engine that makes the topping rise. It must be fresh; old baking powder loses its potency, leading to dense, flat biscuits. Some recipes include a touch of baking soda if buttermilk is used, but this recipe relies on baking powder for consistent lift.
Step-by-Step Recipe
Phase 1: Preparation and Preheating
Begin your journey by preheating your oven to 375°F (190°C). Consistency in oven temperature is key for even baking. While the oven warms up, prepare a 9×13 inch baking dish. Lightly grease the bottom and sides with a thin layer of butter or non-stick spray. This prevents the sugary fruit juices from caramelizing too aggressively and sticking to the pan, which makes cleanup difficult later. Gather all your ingredients on the counter; baking is a process of chemistry, and having everything measured and ready (mise en place) ensures you don’t burn the butter while searching for the cinnamon.
Phase 2: Preparing the Fruit Filling
Peel, core, and slice your apples. Aim for uniform slices, about 1/4 inch thick. Uniformity ensures that all pieces cook at the same rate; otherwise, you might end up with some mushy slices and some crunchy ones. Place the slices in a large mixing bowl. In a separate small bowl, whisk together the sugars, spices, salt, and thickening agent. Sprinkle this mixture over the apples and toss gently with your hands or a spatula until every slice is evenly coated. Let this sit for about 15 minutes; this draws out some natural juices, helping to create the sauce.
Phase 3: Creating the Buttery Topping
In a medium bowl, combine the dry ingredients for the topping: flour, sugar, baking powder, and salt. Whisk them thoroughly to distribute the leavening agent. Now, take your cold butter, cut into small cubes, and add it to the flour mixture. Using a pastry cutter, two forks, or your fingertips, work the butter into the flour. You are looking for a texture resembling coarse crumbs with some pea-sized pieces of butter remaining. These visible bits of butter are the secret to flakiness. Add your milk gradually, stirring just until the dough comes together. Do not overmix, or the gluten will develop too much, making the topping tough.
Phase 4: Assembly and Baking
Pour the apple mixture into the prepared baking dish, spreading it out evenly. Drop spoonfuls of the dough over the top of the apples. It does not need to be a solid layer; gaps are traditional and allow the fruit to bubble up. Place the dish on the center rack of the oven. Bake for 45 to 55 minutes. You are looking for a golden-brown crust and bubbling fruit juices around the edges. If the top browns too quickly, loosely tent a piece of aluminum foil over the dish for the last 10 minutes.
Phase 5: Cooling and Serving
Once removed from the oven, resist the urge to dig in immediately. The filling is molten hot and needs time to set. Let the cobbler rest for at least 20 minutes. This allows the juices to thicken slightly so they coat the apples rather than running off the plate. Serve warm, ideally while the contrast between the hot cobbler and cold ice cream is at its peak.
Tips
- Apple Selection: Avoid Red Delicious apples as they tend to become mealy when baked. Stick to firm varieties like Granny Smith, Braeburn, or Jonagold.
- Butter Temperature: Keep your butter cold until the very last moment. If your kitchen is warm, chill the cut butter in the freezer for 10 minutes before working it into the flour.
- Preventing Sogginess: To ensure the bottom crust doesn’t get soggy, you can pre-bake the apple filling for 10 minutes before adding the topping, though this is optional for this specific recipe.
- Storage: Store leftovers in an airtight container in the refrigerator for up to 4 days. The flavors often meld and improve the next day.
- Reheating: Reheat individual portions in the microwave for 30 seconds, or warm the whole dish in the oven at 350°F for 15 minutes to restore the crispness of the topping.
- Freezing: You can freeze the unbaked cobbler. Assemble it, wrap it tightly, and freeze for up to 3 months. Bake from frozen, adding an extra 15-20 minutes to the baking time.
Variations and Customizations
Spice It Up: For a deeper flavor profile, add a teaspoon of vanilla extract or a tablespoon of bourbon to the apple filling. A pinch of cardamom or ginger can also provide a unique twist on the traditional cinnamon flavor.
Nutty Crunch: Incorporate chopped pecans or walnuts into the topping mixture. Toast them lightly beforehand to enhance their oils and aroma. This adds a delightful crunch that contrasts with the soft biscuit.
Oatmeal Cobbler: Mix half a cup of rolled oats into the dry topping ingredients. This moves the recipe slightly toward a “crisp” hybrid, adding chewiness and fiber to the crust.
Dietary Swaps: For a gluten-free version, substitute the all-purpose flour with a 1:1 gluten-free baking blend that includes xanthan gum. For a dairy-free version, use cold coconut oil or vegan butter sticks and substitute cow’s milk with almond or oat milk.
Fruit Combinations: While this is an apple cobbler, you can easily swap half the apples for pears or blackberries. Peach apple cobbler is another fantastic summer-to-fall transition variation.
Glaze Finish: For an extra sweet finish, whisk together powdered sugar and a little milk to create a glaze. Drizzle this over the cooled cobbler just before serving for a bakery-style appearance.
Health Considerations and Nutritional Value
While this cobbler is undoubtedly a treat, understanding its nutritional profile helps in enjoying it mindfully. Apples are a nutritious base, providing dietary fiber, particularly pectin, which supports digestive health and helps regulate blood sugar levels. They are also rich in Vitamin C and various antioxidants like quercetin, which have anti-inflammatory properties.
However, the added sugars and butter increase the calorie density. A typical serving may range between 300 to 400 calories, depending on the portion size. The saturated fat content comes primarily from the butter in the topping. To make this healthier, consider reducing the sugar in the filling by relying on the natural sweetness of the apples, or use a sugar substitute like erythritol for the topping.
For those monitoring carbohydrate intake, the flour and sugar are the main contributors. Using almond flour for the topping can significantly lower the carb count, though it will change the texture to be more dense and nutty. Portion control is key; serving this cobbler alongside a protein source, such as Greek yogurt instead of ice cream, can help balance the glycemic load of the dessert.
Ingredients
- For the Filling:
- 8 cups apples (peeled, cored, and sliced)
- 1/2 cup granulated sugar
- 1/4 cup light brown sugar, packed
- 2 tablespoons all-purpose flour
- 1 teaspoon ground cinnamon
- 1/4 teaspoon ground nutmeg
- 1/4 teaspoon salt
- 1 tablespoon lemon juice
- For the Topping:
- 1 1/2 cups all-purpose flour
- 1/2 cup granulated sugar
- 1 1/2 teaspoons baking powder
- 1/4 teaspoon salt
- 1/2 cup unsalted butter, cold and cubed
- 1/2 cup milk (whole milk preferred)
- 1 teaspoon vanilla extract (optional)
Directions
- Preheat your oven to 375°F (190°C) and grease a 9×13 inch baking dish with butter or cooking spray.
- In a large bowl, combine the sliced apples, granulated sugar, brown sugar, 2 tablespoons of flour, cinnamon, nutmeg, salt, and lemon juice. Toss until the apples are evenly coated.
- Pour the apple mixture into the prepared baking dish and spread it out into an even layer.
- In a separate medium bowl, whisk together 1 1/2 cups flour, 1/2 cup sugar, baking powder, and 1/4 teaspoon salt.
- Cut in the cold, cubed butter using a pastry cutter or fork until the mixture resembles coarse crumbs with some pea-sized butter pieces remaining.
- Stir in the milk and vanilla extract just until the dough comes together. Do not overmix.
- Drop spoonfuls of the dough over the apple filling, covering most of the surface but leaving some gaps for the fruit to bubble.
- Bake for 45 to 55 minutes, or until the topping is golden brown and the fruit filling is bubbling vigorously around the edges.
- Remove from the oven and let cool on a wire rack for at least 20 minutes before serving to allow the filling to set.
- Serve warm, optionally topped with vanilla ice cream or whipped cream.
FAQ
Can I use canned apple pie filling instead of fresh apples?
Yes, you can substitute fresh apples with two 21-ounce cans of apple pie filling. However, reduce the sugar in the recipe significantly as the canned filling is already sweetened. You may also skip the flour and spices for the filling portion.
Why is my cobbler topping doughy in the middle?
This usually happens if the oven temperature is too low or if the cobbler was removed from the oven too early. Ensure your oven is fully preheated and use an oven thermometer to verify accuracy. Bake until a toothpick inserted into the topping comes out clean.
Can I make this cobbler ahead of time?
Yes, you can assemble the cobbler up to 24 hours in advance and keep it covered in the refrigerator. Let it sit at room temperature for 30 minutes before baking. You may need to add a few extra minutes to the baking time since the dish will be cold.
How do I prevent the apples from becoming too soft?
Choose firm apple varieties and do not slice them too thinly. Additionally, avoid overbaking. Check the cobbler at the 45-minute mark; if the top is golden and juices are bubbling, it is done.
Is it possible to make this recipe vegan?
Absolutely. Substitute the butter with a high-quality vegan butter stick that has a similar fat content to dairy butter. Replace the cow’s milk with unsweetened almond, soy, or oat milk.
Summary (in two lines)
This Irresistible Buttery Apple Cobbler combines tender, spiced apples with a flaky, golden biscuit topping for the ultimate fall comfort dessert.
Perfect for sharing, it is easy to make, customizable for dietary needs, and best served warm with a scoop of vanilla ice cream.